Eufy Camera Installation: Step-by-Step Guide for Beginners

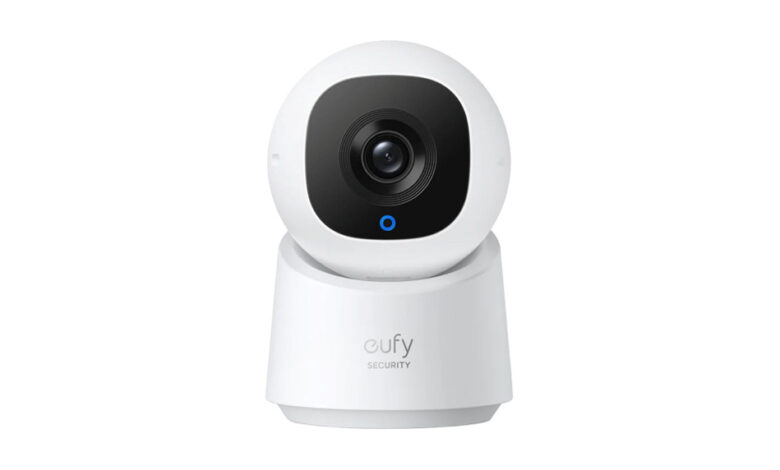
In the present time, there is a high need for security cameras. This is essential for modern home security. The best part is that Eufy cameras provide you with an excellent balance of cost-effectiveness, credibility, and high-tech features. No matter whether you have recently bought a Eufy camera or are considering installing a new one, this guide is worth reading.
Wanna familiar with the Eufy Camera Installation process? If so, you need to walk through this guide. This step-by-step tutorial will confirm that not only a veteran but also beginners can set up their cameras more efficiently. This way, you can surely have peace of mind with a well-secured home.
Let’s go through this post…….
Why Choose Eufy Cameras?
Before going ahead to take a deep dive into the Eufy Camera Installation guide, it’s the right time to understand why Eufy cameras are the best ones. They are surely the greatest choice for home security. Apart from that, these surveillance systems are identified for their high-definition video quality, long battery life, and more. In addition to this, they can easily integrate with smart home systems.
Want to enjoy local storage options provided by Eufy camera? If yes, you need to make sure that your footage remains private without any requirement for a subscription.
Step 1: Unbox Your Eufy Camera and Check Components
Have you received your Eufy camera package? If so, the first step in the Eufy Camera Installation procedure is to unbox and verify all components. Typically, the package involves –
- The Eufy camera(s)
- A HomeBase (for models requiring one)
- Power adapters and USB cables
- Mounting brackets and screws
- A quick start guide
You need to ensure all items are present before going to start the installation.
Step 2: Charge Your Camera
Do you have a battery-powered Eufy camera? If yes, you need to fully charge it before installation. Usually, charging takes around 4-6 hours. A solid blue LED light indicates that the camera is completely charged and ready for installation.
Step 3: Download and Install the Eufy Security App
The Eufy security app is crucial for setting up and managing your camera. Let’s follow the steps given below –
- At the beginning of the process, open the App Store (iOS) or Google Play Store (Android).
- Now, search for Eufy Security and download the app.
- Then, open the app and create a new account or log in if you already have one.
Step 4: Set Up the HomeBase (If Required)
A few certain Eufy camera models need a HomeBase for connectivity. If your model includes one, you can follow the steps given below –
- In the first step, connect the HomeBase to your Wi-Fi router with the use of the included Ethernet cable.
- After that, plug in the power adapter and turn on the HomeBase.
- Thereafter, wait for the LED indicator to turn solid blue. It indicates a successful connection.
Step 5: Add Your Camera to the Eufy Security App
Now, you have to connect your camera to the app. The steps to follow are –
- To kick-start the process, open the Eufy Security App.
- In this step, tap “Add Device” and choose your camera model.
- Now, follow the on-screen instructions to connect your camera to Wi-Fi or the HomeBase.
- Then you need to be prompted to scan the QR code on the camera. Or you can manually enter the device ID.
- Once the devices are properly connected, name your camera so that you can complete the identification procedure.
Step 6: Choose the Best Installation Location
By selecting the right spot, you can enjoy effective surveillance. So, you need to consider the following factors –
- Entry Points:
First of all, install cameras near the front and back doors. It should also be near to the garage entrances, and ground-floor windows.
- Height:
Make sure that you have placed the camera 7-10 feet above the ground. It will be helpful to prevent tampering while ensuring a clear view.
- Field of View:
Confirm that the camera covers the widest possible area.
- Wi-Fi Signal Strength:
It is also a must for you to check the signal strength at the installation location. You can do it with the use of the Eufy Security app.
Step 7: Mount the Camera
Have you selected the correct location? If so, it’s time to mount the camera. Let’s see how it’s possible for you…..
- Initially, you need to use the provided bracket and screws so that you can secure the mount to a wall or ceiling.
- After that, attach the camera to the bracket and then adjust the viewing angle.
- Finally, it’s time to test the positioning. You can do it by checking the live feed in the Eufy Security app.
Note: For outdoor cameras, you can consider additional weatherproofing measures. This way, you can protect against extreme conditions.
Step 8: Configure Camera Settings
To optimize your security system, you need to customize the settings in the Eufy Security app. For the effective configuration the steps to follow are –
- Motion Detection Sensitivity:
First of all, adjust sensitivity levels so that you can avoid false alerts.
- Activity Zones:
Now, set up zones to be able to focus on specific areas as well as reduce unnecessary notifications.
- Notifications:
Later on, you are required to enable real-time alerts for motion detection and other events as well.
- Storage Options:
Finally, it’s time to make a choice between the local storage (microSD card, HomeBase) or cloud storage.
Step 9: Test Your Camera and Adjust as Needed
After completing the installation procedure, you need to run a test run –
- Initially, check the live video feed so that you can enjoy clarity and proper coverage.
- In the next step, walk past the camera to be able to test motion detection and alerts.
- Finally, it’s time to adjust the camera angle if there is a requirement to eliminate blind spots.
Step 10: Maintenance and Troubleshooting
If you want to enjoy long-term performance, you have to regularly maintain your camera.
- Clean the Lens:
First of all, you need to wipe the lens periodically. It will be able to confirm a clear image.
- Check Battery Levels:
Now, you need to move ahead to recharge or replace batteries as per the requirement.
- Update Firmware:
You should keep your Eufy camera’s firmware up-to-date. You can do it easily through the app.
- Troubleshoot Connection Issues:
If you are facing any connectivity issues, you need to try to restart the camera or HomeBase.
Final Thoughts
After going through this post, you will realize that the Eufy Camera Installation is a straightforward process. It enhances your home security with minimal effort. By following this guide, you cn confirm an optimal performance.
For more information visit on our website : Dolphin Techknology


