Netgear Wi-Fi Extender Reset: A Step-by-Step Guide To Fix Connectivity Issues Instantly
Netgear Wi-Fi not working? Is it giving you trouble? Worry not! If so, a Netgear Wi-Fi extender reset is the best option for you. It is helpful for you to restore your connection in minutes. Now, say goodbye to all issues with your electronic device such as – slow performance, connectivity drops, or failure to connect to the main router.
Have a sigh of relief and get an effective solution after performing a reset!!
Are you wondering how to reset Netgear Wi-Fi extender? If yes, you need not to worry at all. In this detailed guide, we will help you go through all the steps so that you can restore as well as optimize your Wi-Fi extender’s performance. In addition to this, you can also resolve all persistent network issues, inappropriate settings and software glitches.
Let’s walk through this post and confirm a stable & strong internet connection across your home or office……..
Why You Might Need to Reset Your Netgear Wi-Fi Extender
Simply put, a Netgear Wi-Fi extender is a valuable device. It assists you to expand the coverage of your existing wireless network. There is a high significance in resetting your Netgear Wi-Fi extender.
But one thing that you need to keep in mind is that before going ahead to kick-start the reset procedure, you must have an eye on the common reasons for the same. After going through these common reasons, you will know why you may need to reset your Netgear Wi-Fi extender.
Let’s move forward to the key points mentioned in this section –
- Connectivity Issues: Your extender can be unable to maintain a stable connection with your router.
- Slow Internet Speed: It is possible that your extended Wi-Fi network is noticeably slower than your expectations.
- Incorrect Configuration: Sometimes, settings are changed incorrectly or your extender may not be functioning properly.
- Forgotten Login Credentials: You may have difficulty accessing your extender’s web interface due to lost login details.
- Firmware Update Errors: If a firmware update is interrupted, it may cause several software issues.
Step-by-Step Instructions For Netgear Wi-Fi Extender Reset
Curious to know the methods for resetting your Netgear Wi-Fi extender? If yes, you are in the right place. In this section, we have mentioned two main methods for resetting your Netgear Wi-Fi extender.
Once you restore your Netgear Wi-Fi extender, you can restore it to its factory settings. It allows you to reconfigure the device as if it were brand new.
Let’s have a glance at all the methods for the same –
- Soft Reset – It is all about rebooting your extender without erasing its current settings.
- Hard Reset (Factory Reset) – This method helps you to restore the extender to its default factory settings.
Let’s explain both methods in detail.
Method 1: Soft Reset Your Netgear Wi-Fi Extender
A soft reset is all about rebooting your extender. For this, you need not to wipe any saved settings. This method helps you the most when your extender is facing minor connectivity issues.
Steps for a Soft Reset:
- Unplug and Replug the Extender: At the beginning of the process, you need to disconnect the Netgear Wi-Fi extender from the power source. Then, wait for 30 seconds. You have to do it before plugging it back in.
- Reboot Using the Power Button: Now, press the power button on the extender. It helps you to turn it off. Then, you are required to wait for 10 seconds. Later on, turn it back on. Finally, you can allow your device to fully restart. It will surely take 2-3 minutes.
- Reconnect to the Network: In this step, you need to make sure that your Wi-Fi devices – laptop, phone, etc. have been reconnected to the extended network.
Method 2: Hard Reset (Factory Reset) Your Netgear Wi-Fi Extender
A hard reset is helpful to you to erase all saved settings. It includes – your Wi-Fi name (SSID), password, and custom configurations. This is surely the best solution for you if your extender is facing any kind of major issue.
Steps for a Hard Reset:
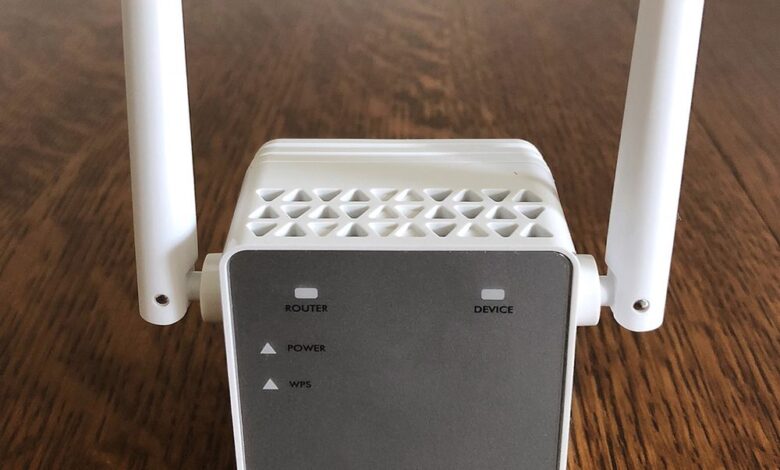
- Locate the Reset Button: It is true that the reset button is usually found on either the back or bottom of the Netgear extender. It is a small, recessed button that needs a paperclip or pin to press.
- Power On the Extender: You need to make sure that the extender is plugged into a power outlet & turned on. After that, wait until the LED lights on your device are stable.
- Press and Hold the Reset Button: In the first step, use a paperclip or pin to press the reset button. Now, hold this button for 10-15 seconds. After that, release the button when the extender’s lights begin to blink or turn off and on. It is an indication that the device is perfectly reset.
- Wait for the Extender to Restart: Undoubtedly, the whole reset process may take 1-2 minutes. Once the reset procedure is accomplished, your extender will restart and return to factory default settings.
Reconfiguring Your Netgear Wi-Fi Extender After Reset: How?
Now that your Netgear Wi-Fi extender has been reset, you can follow the steps given below to reconfigure it from scratch.
Step 1: Connect to the Extender’s Default Network
- Firstly, open your Wi-Fi settings on a computer or mobile device.
- After that, look for the default Netgear Wi-Fi extender network. Usually, it is named NETGEAR_EXT.
- In the last step, connect to it. Initially, you don’t need a password for a successful connection.
Step 2: Access the Setup Page
- Now, open a web browser.
- In the next step, type http://mywifiext.net or 192.168.1.250 in the address bar.
- Finally, press Enter, and you will be directed to the Netgear extender setup wizard.
Step 3: Set Up the Connection
- Initially, click on New Extender Setup.
- Next, follow the on-screen instructions so that you can connect your extender to your router.
- In the last step, select your main Wi-Fi network and enter its password.
Step 4: Create a New Extended Network
- To kick-start the process, set a new Wi-Fi name (SSID) for the extended network.
- Now, choose a strong password for security.
Step 5: Complete the Setup
- First of all, save the settings and allow the extender to restart.
- Once the device is restarted, you can easily reconnect your devices to the new extended network.
How To Troubleshoot Issues After Resetting?
Is your extender still not working properly? If yes, you can try the solutions given below-
- Check Router Placement: To initiate the troubleshooting process, you need to make sure that your extender is within a good range of the router.
- Update Firmware: Now, visit the Netgear support website so that you can check for firmware updates.
- Ensure No Interference: In the next step, you need to avoid placing your extender near microwaves, cordless phones, or thick walls.
- Contact Netgear Support: If the issue still persists, you can reach out to Netgear customer support. It is best for further assistance.
Final words,
In short, performing a Netgear Wi-Fi extender reset is not only simple but also an effective way to resolve all network connectivity issues. No matter if you choose a soft reset or a hard reset, this guide will surely provide you with all the steps for resetting and reconfiguring your device.
Once you follow these instructions, you can confirm that your Wi-Fi extender functions optimally. It provides you with seamless and interruptions-free internet coverage in your home or office. Have you ever faced persistent issues? If so, you can update the firmware or relocate the extender. It is helpful to you to enhance performance.
It is confirmed that with the help of this troubleshooting guide, you can know everything that you are required to reset your device. Apart from that, you can also troubleshoot your Netgear Wi-Fi extender more effectively.