Are you striving to sync your Roku remote without a pairing button? If so, you need not panic at all. Because you are not alone who is suffering from this problem.
Certainly, it is the most common problem that can disrupt your seamless experience and can also leave you puzzled. But, in case your favorite shows are out of reach, you can explore this blog post.
In this article, we have outlined the key process that will let you know how to sync Roku remote.
Undoubtedly, this guide will demystify the process and later on turn your frustration into relief. You will easily take a deep dive into this complex task more conveniently.
It is all because of a special button that most Roku remotes have. This will help you to make it easy for you to connect them to your TV. But, once in a blue moon it also happens that a few remotes do not have this handy button. And it is really troublesome for you to connect it to your TV.
Rest assured!
Once you dive into the simple steps given in this blog, you can easily reclaim your control over your overall entertainment destiny. This way, you can perform the syncing process in the easiest manner. Do you want to unlock the hidden secrets to sync your Roku remote? If so, let’s delve into the information given in this post!
Step-By-Step Process To Sync Roku Remote Without Pairing Button
Is your Roku remote lacking a pairing button? But don’t worry! You can still sync it with the use of the steps given below. So, it is damn sure that by following these steps, you will be able to successfully sync your Roku remote without a pairing button.

Finally, you can also confirm a seamless control of your Roku device. Let’s have an eye on the steps given below –
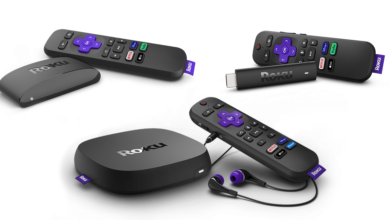
1. Insert Batteries into the Remote
Initially, you need to make sure that the batteries are correctly inserted into your Roku remote. For this, you can use fresh, and high-quality batteries. Later on, it will be helpful to you in avoiding every power issue.
2. Restart Your Roku Device
- Unplug the Power: First of all, disconnect your Roku device from the power source.
- Wait for 10 Seconds: Now, allow the device to fully power down.
- Plug Back In: After that, reconnect the power cord. Thereafter, allow the Roku device to boot up completely.
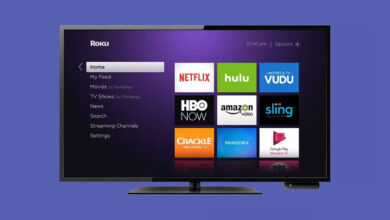
3. Navigate to the Home Screen
With the use of the remote of your Roku device or the Roku mobile app, you can easily navigate to the Home screen.
4. Use the Roku Mobile App as a Temporary Remote
- Download the App: If you don’t have the app on your device, you have to download the Roku mobile app. To do so, you have to visit the App Store ( iOS device) or Google Play Store (Android device).
- Connect to Roku: Now, you need to ensure your mobile device is connected to the same Wi-Fi network as your Roku device. Next, you need to open the app and choose your Roku device from the list of available devices.
- Use the Mobile App Remote: After that, you are required to navigate to Settings using the app.
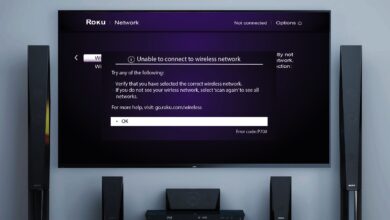
5. Go to Pairing Settings
- Navigate to Settings: First of all, you have to use the mobile app to go to Settings on your Roku device.
- Select Remotes & Devices: This step is all about choosing “Remotes & Devices” from the Settings menu.
- Pair a New Device: Select the option to pair a new device.
6. Automatic Pairing
Once you are done with choosing the option to pair a new device, your Roku device ought to automatically start searching for available remotes. So, it is a must for you to confirm that your remote is close to the Roku device.
7. Reboot the Roku Remote
Suppose, the remote does not automatically pair, you are required to follow the steps given below –
- Remove the Batteries: At the beginning of the process, you have to take out the batteries from the remote.
- Reinsert the Batteries: Next, put the batteries back in. It will help you ensure that they are correctly positioned.
- Wait for the Pairing Process: Last but not least, you should let your remote automatically attempt to pair with the Roku device. Make sure that you are doing it once the batteries have successfully reinserted.
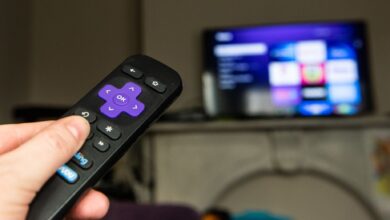
8. Check the Remote Functionality
In this step, you have to test the remote to make sure that it is working correctly. For this, you can navigate through the Roku interface. It will be helpful to you to verify that all the buttons are working properly as per your expectations.

9. Factory Reset the Remote (if required)
Still, you are having difficulties pairing the remote? It will be worth following the steps given below –
- Remove the Batteries: In the first step, take out the batteries from the remote.
- Press Every Button: Now, it’s time to press all buttons on the remote as it will be helpful to you in draining any residual power.
- Reinsert the Batteries: Later on, it will be best to insert the batteries back into the remote. Thereafter, you can try the pairing procedure again.
10. Contact Support
In case, none of the steps given above works, you can contact Roku support for more guidance. Or you can consult them to purchase a new remote.
Final words
In short, in this guide, you will be able to have a glance at the different ways that will make you aware of how to sync Roku remote without using the pairing button. Initially, it will seem harder, but you should not feel anxious about such an issue. In this post, we have mentioned exclusive tips and methods that will make the whole syncing process easier & smoother than before.
So, no matter, if you have lost your remote or feel unable to reach the pairing button, the key details given below will be helpful to you. By digging a little deeper into this post, you will be capable of figuring out the issue and solving it promptly. All you need to do to lower your stress is walk through the information given in this post.
For more information visit on our website : Dolphin Techknology